
In this screen, users can define the various procedures and appointment types that can be scheduled. This is the list of appointment types (Required Field) which appears in the New Appointment Dialogue Box, in the Recall type list, and on the Scheduler screen in the Appointment Legend.
In addition

Filopto offers a recall reminder message to alert users that a recall should be created for the patient. The recall reminder can be defined to be active during a specific task. To activate the Recall reminder go to the System settings / Scheduler / Appointment Types and Recall Setup and choose the time when the system should display the recall Reminder Message for staff..

Appointment Check Out when Printing Invoice
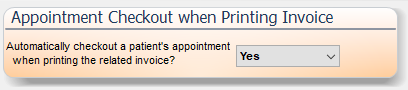
The Checkout status for an appointment can be automatically triggered as completed when printing the patient invoice in the invoice screen. If automatically triggered, it will automatically close the patient visit.
To use this "auto" feature, two items must exist:
1) The feature must be turned on here in the Filopto system settings. (Yes for On, No for Off)
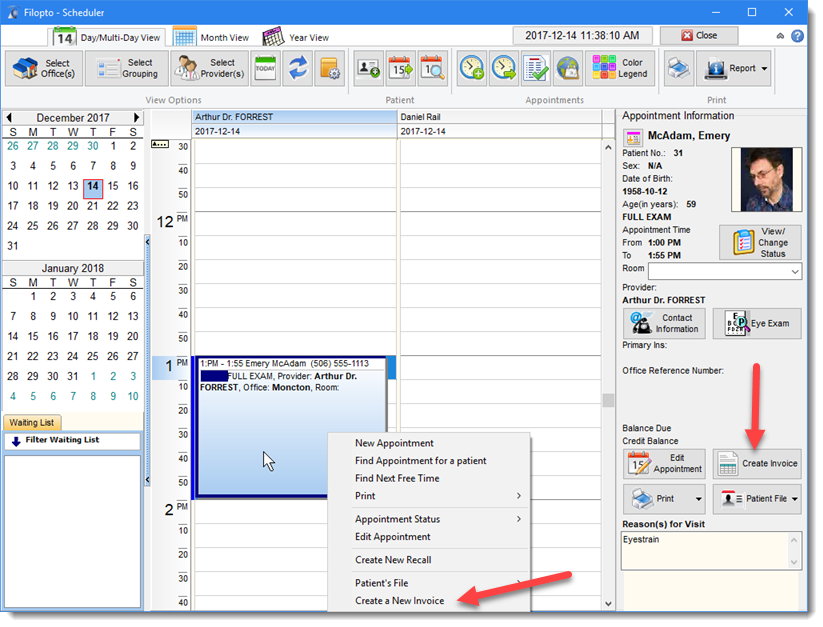
2) The invoice must have been created via the Scheduler screen to link the appointment to the invoice.
New Appointment Type button.
A user can define the name for the appointment or procedure, the estimated time needed for the appointment (this is used to automatically allocate the proper amount of time in the Scheduler), assign a color code to the appointment type, assign the amount of months before the next recall for this type of appointment, and any special instructions which should be passed on to the patient upon making the appointment. The appointment special instructions entered in this section will automatically be displayed in the appointment dialogue box when the appointment type is selected.
To display the Appointment type in the Appointment screen the Appointment type must be Active. If no Check Mark is present in the Active field then the appointment type is not shown in the appointment screen.

Important:
Please note that to enter a time entry for an appointment type, you must press the space bar after you have entered a time in the time field. For example, to enter 22 minutes for an appointment, you would enter 22 followed by a space (press the space bar). Once the space bar pressed, the entry will be converted and displayed as 22 Minutes.
|
To select the appointment color and legend for the Scheduler
To assign the color on the scheduler legend grid, select the appointment color item in the grid. A drop-down option will become available from which you can select the color you want to assign to the selected appointment type. The last item in the list is custom permitting a user to select from over 64 Million colors.
Send Appointment to Exam Module by default
The Send to Exam field will cause the appointment to be automatically sent to the exam module. If it is not checked then the appointment record is not sent to the exam module (must be manually set at appointment time) and will not appear on the EMR Manager list as an appointment for the provider. The advantage of this item is that appointments can be taken which will not affect the providers EMR schedule you can have appointments that are for other providers and will not be sent to the EMR module (contact lens fittings for example).
Set Appointment as Tentative by default
The Tentative check box permits placing the tentative appointment flag by default. When checked when a new appointment is created it will be placed with the tentative flag meaning it needs to be confirmed prior to the appointment date. Users can confirm the appointment with the Patient by using the Scheduler Confirmation list feature.
To set the Recall period for an appointment
To set the automatic Recall time for a particular appointment, enter the number of months in the "Recall Month(s)" field for the appointment type selected. This entry will be used to automatically calculate the recall period when creating an appointment schedule for a patient.
Change Status of Appointment Type: The value is either Active or In-Active. Active means it will be displayed as an appointment type in the Appointment screen. In-Active, will hide (not display) this appointment type (you will not be able to schedule this type of appointment).
WARNING:
When you de-activate an appointment type, the appointment screen will not display the de-activated appointment type in the drop down appointment field. If you open historical appointments with the appointment screen the appointment type will be blank.
|
