
This option is only available if the optional e-mail Manager license has been activated.
IMPORTANT:
Sending large quantity of e-mails may be considered as a Spam act which may contravene your Internet service agreement and/or your local Telecommunication legislation. Verify beforehand with your Internet Service Provider (ISP) and legal advisor that you are allowed to send your e-mails and the specific requirements (if any) that you must meet.
Also verify what constitute SPAM in your legal jurisdiction. Review all Anti-Spam and other relevant legislation in your jurisdiction since it may require you to meet specific requirements such as; that commercial emails be identified as advertisements and that it includes the sender's valid physical postal address among other legal requirements or that your Patient has accepted to receive e-mails from you.
If you have concerns about sending large quantity of e-mails, always refer to your legal advisor before sending large quantities of unsolicited e-mails. Many countries, states and provinces have legal and financial penalties for sending unsolicited (spam) e-mails.
Reference: CAN-SPAM Act of 2003 (USA) Bill C-6 (Canada) S.C. 2010, c. 23 - http://fightspam.gc.ca Canadian Radio-television and Telecommunications Commission Act, the Competition Act, Personal Information Protection and Electronic Documents Act Telecommunications Act CAUCE CANADA CAUCE US http://www.spamlaws.com/state/summary.shtml
|
To create an e-mail marketing campaign you use the New Profile button located on the Communication and Marketing Tool bar.

The Wizard will be displayed. Complete the appropriate fields and continue in the Wizard.

Select the e-mail option
IMPORTANT:
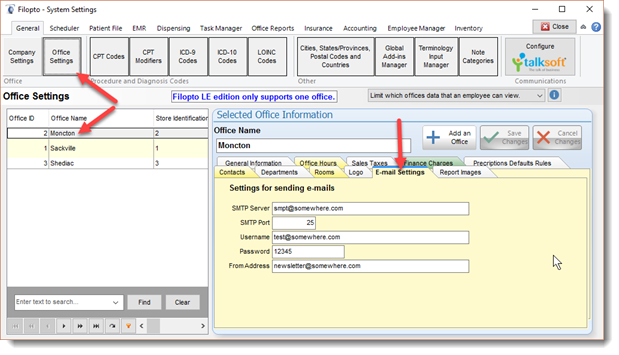
The e-mail internet connection Filopto will use to send the emails is the email defined in the Filopto System Settings / Pick list settings for the office of the user using this function. If no settings or incorrect settings exist the email will not be sent.
|

Create your Query that will select the information you wish to use in your e-mail. In the example we are doing a simple query on the patient file for all patients having a home e-mail address in their file.
Example: Select
PatientNo,
LastName,
Firstname,
E_mail
From PATIENTS
Where e_mail IS NOT NULL
If you use the built-in "Ask a Question" editor to create your query, you can select one of the available data dictionary to quickly access various data tables in Filopto.

The Execute  button will retrieve the data queried and display it in the bottom grid of the wizard.
The following screen will permit you to select the fields you want to use in personalizing your e-mail template.

The next screen allows you to enter the subject of your e-mail and what field to use to derive the recipient e-mail address.
Filopto allows you to query any information in it's database. Therefore you could also use the e-mail recipient field for patients, providers and family doctors for example. Example: If you query the Patient file, when you select the Recipient of the email as the Provider group, the email will be addressed to the provider specified as the provider on record on the patient file.

The last screen allows you to create the e-mail template to use when you run this profile.

When you select the Create a new document template you will be asked to provide a name for the template.

You will then be placed in the Template Form Editor where you can create your message. At run time the form will be converted to a PDF attachment to the e-mail.
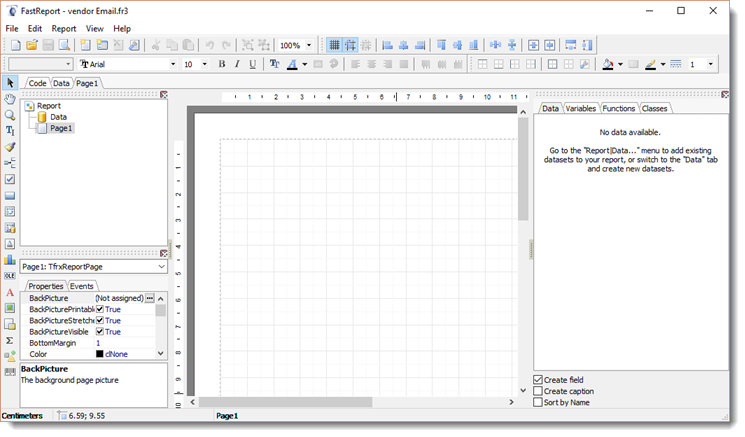
When you enter into the editor you may notice a data warning. By default Filopto will connect the query to the Form editor automatically, however in some complex query settings it may not be able to auto-connect. This warning states how to connect the query information from the wizard to this template. Follow the instructions and place a check mark in the Select Report DataSets.
|
The message appears at the right of the screen in the Data tab. |
|
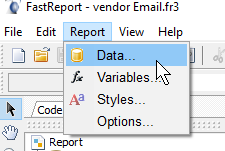
Located on the menu bar at the top left of the screen. Select the Report Menu and Data option to link the query you created for the email merge. |
|
Place a Check mark beside the listed query component. Once selected press the OK button to link the query to your email merge template. |


Once the data set is activated by placing the check mark the data fields from the query become available. You can use these fields to personalize your e-mail message. By default in an email merge you have access to all fields contained in the original query before any filter is applied.

The following is an example of an e-mail message you can create. You have access to all the features of the form editor such as Rich Text and color options (see Report / Form Designer for more information). This e-mail template when executed will convert the e-mail template into a PDF file ( in this example, replacing the fields for the patient First and Last name with their actual name) which is then attached to the e-mail sent using the Patient e-mail address.

