

The Marco Connect software is supplied with the Filopto equipment connector you will require to connect to your diagnostic equipment. The images below illustrates how the Filopto and Marco connect software functions together.
The current version to use is: Marco_Connect_Setup_V8204.6.exe for USA customers and 8203.exe for Canadian Customers located on the Filopto server in the Marco folder.
IMPORTANT: The Marco Connect software must be running at all times for the link to function properly. We strongly recommend that you have it started automatically when Windows starts. If the Marco connect software is not running, incorrect data will be entered in the Patient exam record. Consult your IT administrator on how to automatically start the application at Windows start up. The Marco Connect software must not be installed on a Filopto server or Filopto Remote Desktop Server.
The Marco Connector is updated from time to time. We strongly recommend that you use the latest version at all times.
|
Filopto is installed on a local workstation that is directly connected to the diagnostic equipment.

In this environment Filopto and the Marco Connect software is physically installed on the local workstation connected to the diagnostic equipment. The data from the diagnostic connector is saved locally on the local workstation. The Marco Connect software must be running for the link to function. If the link is not started, incorrect data will be entered in the patient exam file. The setup of the Marco Connect requires the data storage folder for the diagnostic equipment to be created locally on the workstation (see below).
Filopto is used in a Remote Desktop environment

In this environment the Marco Connect software is physically installed on the local workstation connected to the diagnostic equipment. The Workstations connects to Filopto using a remote desktop server and the diagnostic equipment data is saved on the Filopto Remote Desktop server. The setup of the Marco Connect requires the data storage folder to be created on a connected and mapped shared drive located on the Filopto Remote Desktop server (see below).
How to Install the Marco Connect Software
Note: You may need administrator rights on the PC to complete the installation. Please consult with your IT department. You will need a Communication Port installed on the workstation as well as the cable to connect the PC to the diagnostic equipment (see diagnostic equipment manufacturer requirements). The Marco Connect software is located on the server in the C:\Program Files (x86)\Filopto9\Marco folder. Copy the software to the applicable workstation for installation.
Install the Marco Connect software on the local PC connected to the diagnostic equipment you wish to link to Filopto, run the Marco Connect installation software on the connected local Workstation.


 Use the icon created on the desktop to launch the Marco Connect software. The software must be started for the connection link to Filopto to function.
Creating/Sharing the Filopto Equipment Diagnostic Data Folder
By default the data equipment folder used to save the data sent by the diagnostic equipment is located in the C:\ProgramData\Filopto10\EquipmentData\ folder on the workstation or remote desktop server depending on your work environment. The user must have read, write access to this folder. If you are using a remote desktop environment, the folder must be mapped to the local workstation connected to the diagnostic device.
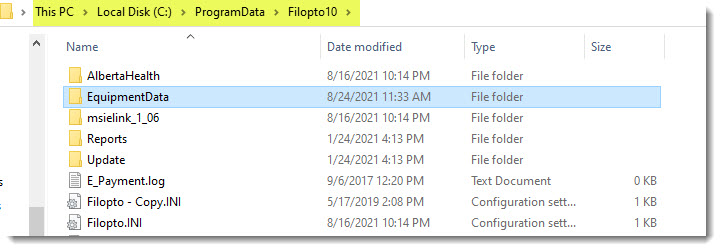
If you have multiple diagnostic equipment connected to Filopto you must create a folder for each device you will be linking. For example, if you have multiple devices you would have, for example, the following folder structure.

IMPORTANT: Each diagnostic device must be linked to his own corresponding folder. If you link a device to the wrong folder, incorrect data will be loaded into Filopto.. Also, users must load the data from the correct folder (the folder corresponding to the device they are using). |
Configuring the Marco Connect Software
Once the Marco Connect software is installed, start the program and you will be presented with a configuration screen.

For the link to function the following items must be present:
1) The device link must be active
2) The Diagnostic Equipment Model must be selected
3) The Communication protocol used by the diagnostic equipment must be selected (some devices support more than one communication protocol. You must select the one configured as active in your diagnostic equipment).
4) You must enter the valid communication parameters for connecting to your diagnostic equipment. These settings are set in the diagnostic equipment settings.( refer to your diagnostic equipment user manual for more information).
5) Select the Options icon to finish the configuration
The option screen will be displayed

IMPORTANT STEPS THAT MUST BE COMPLETED IN THE OPTION SCREEN:
1) The basic information should be automatically entered by default. If they are incorrect you may need to manually modify them to permit a connection to occur to your diagnostic equipment. The most important item is the COMM Port Type. This field must be set to the type of COM port you are using to connect to your diagnostic equipment. In most cases it will be a RS-232 connection which is identified as a value between COM1 to COM14. Only the COM Ports available will be displayed, You must choose the correct COM Port to which your diagnostic device is physically connected.
2) The Output Path has to be clearly identified for the link to function. See above "Creating/Sharing the Filopto Data Folder" section on the proper location of the required output folder. You must enter the correct path to the folder you will be using.
▪ For example if you created a LM1000-1 folder on the local workstation the following would be the path: C:\programdata\filopto10\equipmentdata\lm1000-1\ (Important:the last slash must be present for the correct folder to be used).
▪ Example for a mapped drive on a Filopto remote desktop server: Z:\programdata\filopto10\equipmentdata\lm1000-1\ (Important: the last slash must be present for the correct folder to be used, and notice that the drive has been mapped locally).
Importing the Diagnostic Data into Filopto
1) Generate your Data File : Make certain that the Marco Connect software is running. Use the print, export or other button/action from the diagnostic equipment to generate and send the recorded diagnostic data to the com port. (Verify the diagnostic equipment user manual on the proper procedure to generate the data and how to send it via the com port of the diagnostic equipment, follow the manufacturers instructions).
2) Import the data into Filopto: Open the Patient Exam record in Filopto. In the Filopto EMR screen locate the Diagnostic Equipment button and select the Marco Connector option. This will open up the Equipment Data folder. Select the folder associated with the diagnostic equipment you want to import the data from and click on the file displayed. The data will be loaded in the opened Patient file.

