When installing and using the Filopto Duo (DU) or Enterprise (EE) edition of Filopto (Multi-office editions) the default configuration can be changed for reports/forms to automatically use the Office/Branch information versus the corporate information created in Filopto.
1.After setting up your Corporate information (Company Settings) in the Configuration Manager tab/ Filopto System Setting /Pick List button. Chose the Office Settings button (1) to setup each office. You can add offices by selecting the Add an Office button (2). and entering the Office Name (3) and related information (4) contained in the various tabs associated with the office. Entering a logo in the logo tab(5) will permit the "reports/forms by office/branch" to use the entered information related to the office. The Office Hours tab also controls what will be displayed in the patient scheduler for the selected office.

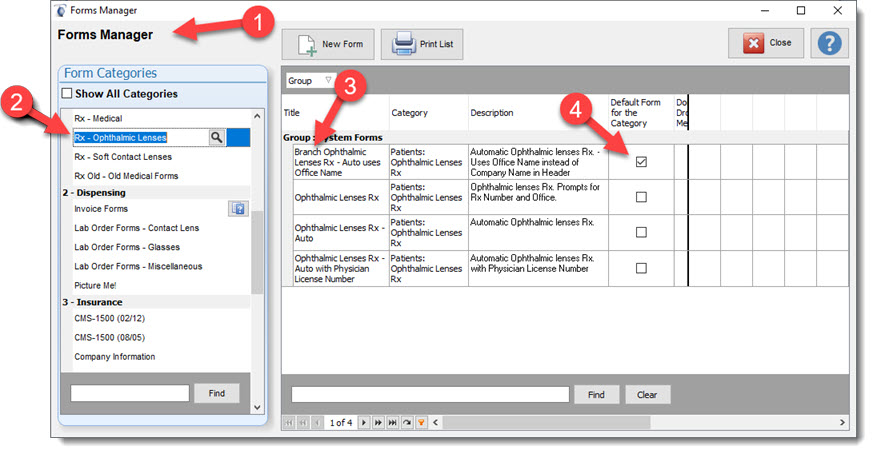
2.When setting your default forms and reports for Filopto to use, select the forms/reports that are designed for use for Office or Branches (3) settings. By selecting these types of reports/forms the reports/forms will automatically use the office information/logo for the office in which the user is log into. In the example below we are using from the Form Manager(1) the RX-Opthalmic Lens (2) Branch form (3) and have set this form as the system default (4) for users. many different branch/Office reports/forms exist. You can also copy and convert your own reports/forms to use the Branch/Office settings below.
How to Setup a Form/Report to use Branch/Office information
1.In your Report/Form add the following query component:
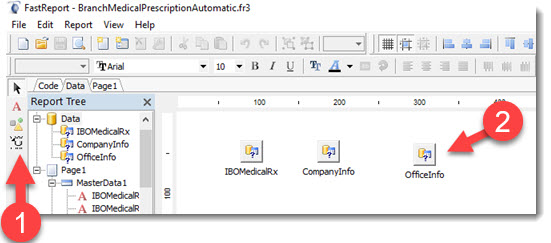
Create a Query component (1) in the Data folder of the Report/Form editor. Call the component "OfficeInfo" with the following query entry for the query component.
Select *
from OfficesMaster
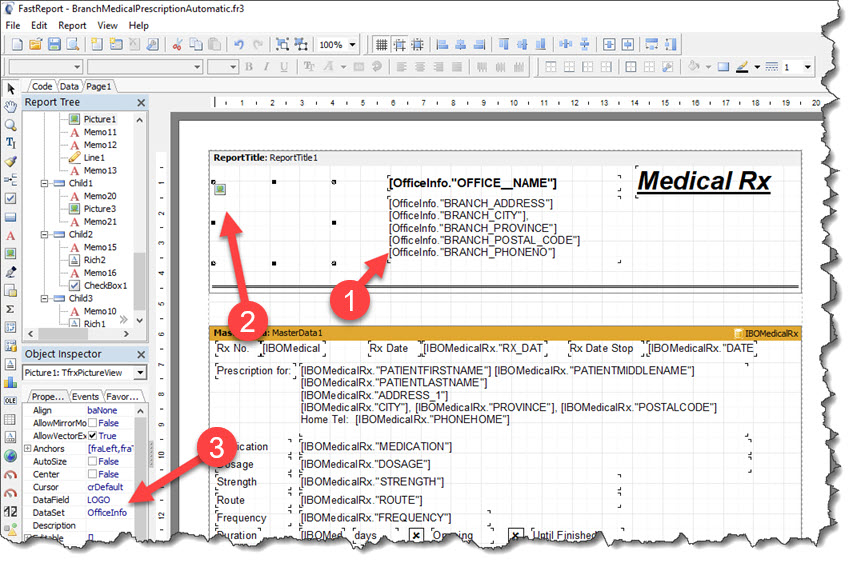
2.In your Report/Form change or add the Branch link to the data you want to display. For text, select the Officeinfo fields (1) available from the Officeinfo query component. To link your office Logo select the Image component (2) and select the Logo field for the DataField setting and the Officeinfo DataSet for the DataSet setting (3)