(Optional Module)
The Alert Warning Manager permits users to define pop up windows to inform users of one or more actions they must take when dealing with the given patient.


Create an Alert / Warning
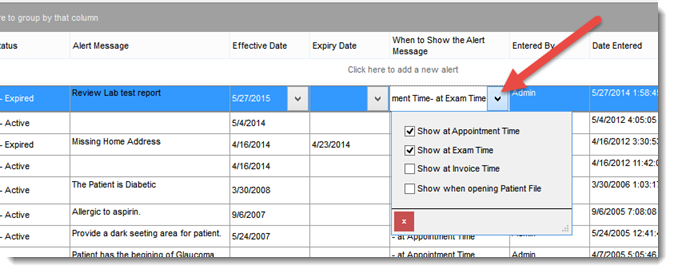
Click in the top row (Click here to add a new alert) Enter in each field the information required:
Remove an Alert / Warning
Enter in each field the information required:
Alert Type: This is a drop down list classifying the types of Alerts and Warnings created.
Alert Message: the message you wish to display
Effective Date: the date from which the system will start showing the Alert / Warning
Expiry Date: The date the system will stop showing the message
Create Date : Date created
Created By: Created by user
Modified Date: Date the message record was modified
Modified By: User that modified the message record.
Show When: Place a check mark beside the listed entries when you want the specific message displayed. At the specified times a Alert message such as the one shown below will be displayed listing all messages or warning entered for the patient.
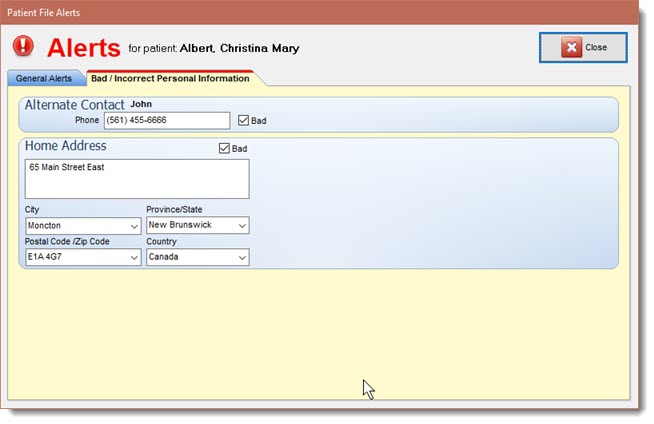
Bad / Incorrect Personal Information
The Bad /Incorrect Personal Information tab displays reminders for users to take corrective action to correct bad or incorrect patient records. The Bad / Incorect Personal Information tab is only displayed when an item has been flagged as incorrect and needs to be verified with the patient. For example is an address is incorrect ( mail got returned) a user can flag the incorrect address and this item will be added to the Alerts to permit the user to clarify and correct the issue when next dealing with the patient.
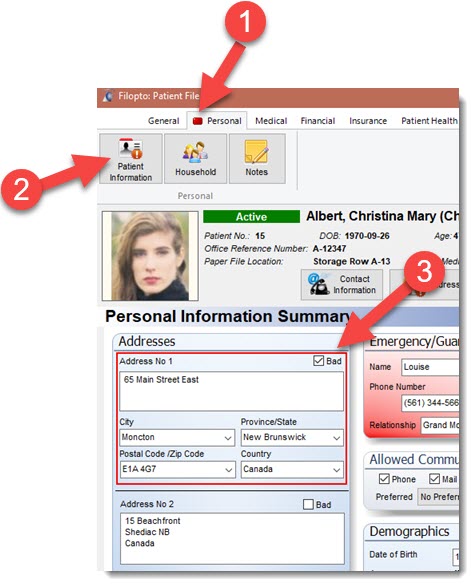
To flag an item to be added to the alerts bad /Incorrect Personal Information tab you can place a check mark beside the item via the patient screen or patient panel.

Note that on the Patient file if an Alert for bad info is flagged ( Field Bad - 3) a red square appears on the tab (1) and a red ! (2) appears on the icon and the item which has been flagged is highlighted for easy recognition (3) .
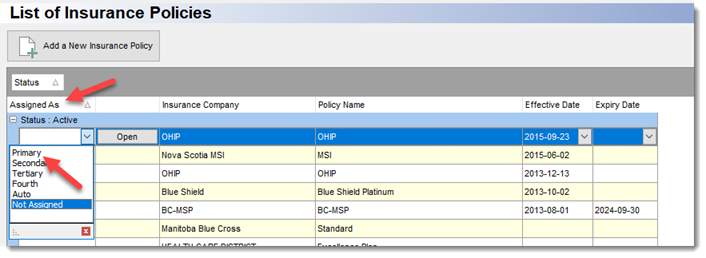
If you have acquired the Alert Module for your Filopto installation you may see the following alert. If an active insurance policy exist but none are assigned as the primary insurance policy, Filopto will warn you to assign a primary policy for the patient so that your claims can be process with minimal intervention from the users. Not assigning your Insurance policy as primary will cause the users to find and select it every time. By assigning it , Filopto will automatically use the policy when creating claims.

To assign the insurance policy, select the Assigned As field and select the "Primary" option from the drop down. Having one "Active" insurance policy assigned as primary will remove the Alert Notice and permit Filopto to function optimally. (see below)
IMPORTANT:
The Alert Manager will automatically assign the existing active insurance policy as Primary when creating an Invoice, if only one active policy exist. This feature is not available when opening a Patient file. To clear the insurance policy alert when opening a Patient file, manually assign an active policy as primary (see below)
|