Some screens allow users to import or add drawings and pictures to the Exam record. If you have a physical picture, you can also use it in this module by first scanning the picture into the system. Note that Filopto supports any Twain scanner supported by your operating system as well as many diagnostic equipment connectors.
Important:
You cannot annotate an image of a previous exam. You can only annotate images from the current exam.
To load a new image select the Add Image button (1) and then you can use the load image(2) button to load the image into Filopto. You can then use the Annotate Image button to annotate the image. Make certain to include an Image Title for easy reference.
To be able to annotate or save an image, the image must be stored in one of the numerous file formats supported by Filopto. (see Supported image, document and video format for more information)
|
 Permits the loading of multiple images simultaneously into a Patient image record. Select the images by using the Windows Shift or Ctrl key feature to identify the images to load at the same time. (see Windows Help on how to use the Shift or CTRL keys).
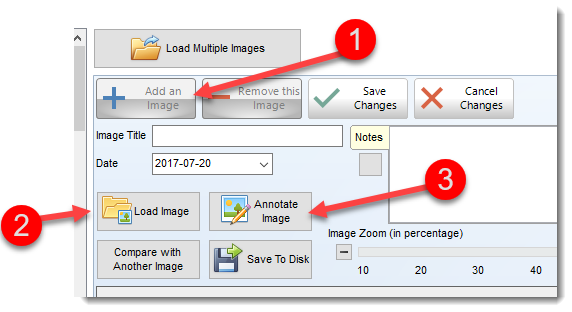
 To add a new (single) image click on the Add an Image button to create a new record. Then you can click on the Load Image button to load the image. Enter a name for the image in the image title. This title will be used in the image grid to list the various images you have created.
 To remove an image from the patient record select the image and then select the Remove this Image button.
 When an image is modified the Save Changes button will be activated to permit the user to save the changes made to the image.
IMPORTANT:
Filopto will automatically save the image and other information if the user moves to another record (image or tab) prior to the user saving the image record.
|
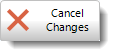 Cancel the saving of any change(s) made to the image record.
Filopto provides some default images that you can use to draw your findings upon. These images are located in the Filopto/Image folder. You can add additional images or replace the ones provided. If you are using diagnostic equipment you can also load the various pictures you take into the patient file.
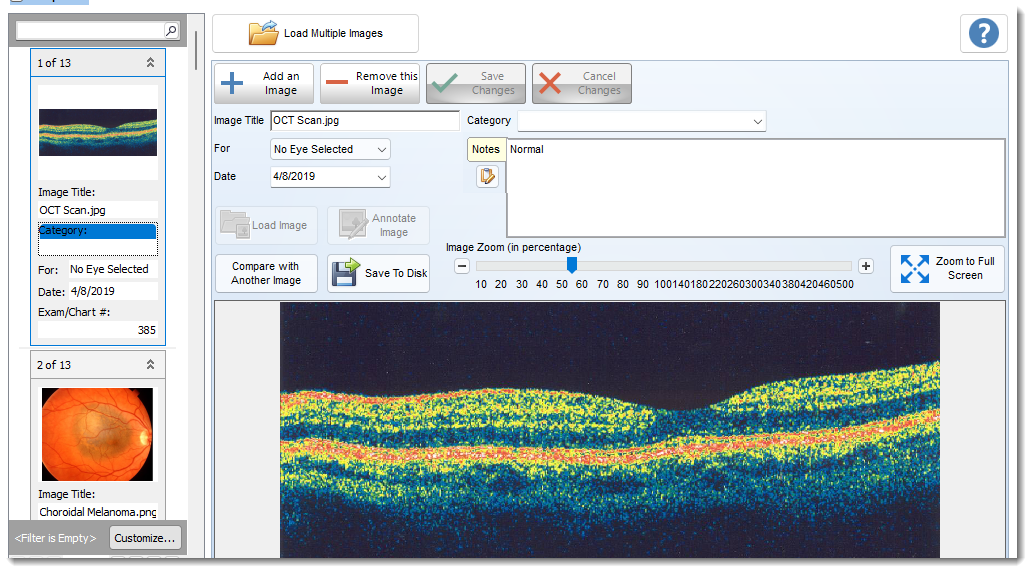
The image module is divided into three primary areas. The first is the image list located to the left of the screen. By selecting an image title on this grid, the image will be displayed in the picture area located to the right.
The second area is the picture area which will self-adjust depending on the drawing tool chosen. It is designed to display most common images formats.
The third area is the drawing center itself, located at the bottom of the screen. It displays a series of buttons and tools and allows you to annotate the selected picture with your findings.
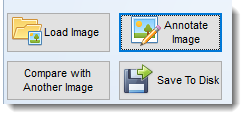
Load image: permit user to load any image from their system into the Exam record
Annotate Image: permit users to annotate the selected image using the annotate tools (see Annotate Image Tools)
Compare With another Image: permits users to compare two images
Save to Disk: permit users to save an image to their PC hard drive.
IMAGE ZOOM Feature
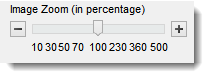
The Zoom feature permits users to adjust the size and zoom in or out of a image. The zoom factor is determined by the images type being displayed and may vary from 10X to 1000X. In addition a user can click on the left mouse button to Zoom In (next automatic zoom step), the left mouse button to zoom out (next automatic zoom step) or use the mouse wheel to do both actions in a more granular fashion.
The Mouse wheel and mouse click option permit a greater degree of zooming than the image zoom selector which provides the normal zoom for the image type. If you wish to exceed the amount of zoom from the Zoom selector use the mouse click or mouse wheel option to go above or below the displayed Zoom selector option.
|
Save Text related to Image
To associate text to a picture, enter the Image Title, For field, date Field, and Category to describe the image type. You can also add text into the image note section.
You may also use the Annotate Image button to add text directly on the image.(see Annotate Image Tool).
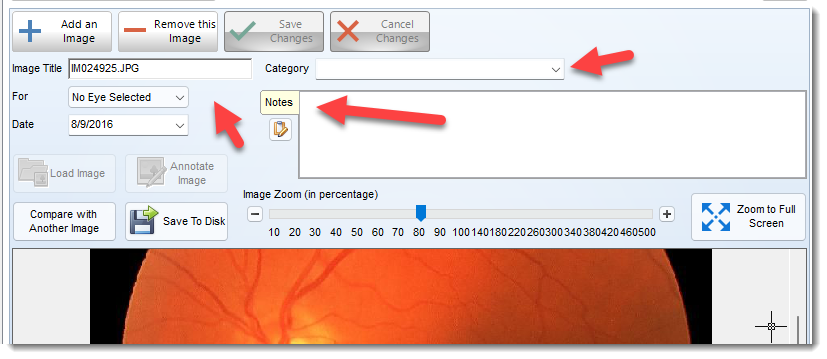
The Category list shown can be user modified by going to the System Settings/EMR/Clinical Notes and SOAP Pick List and using the Image Category (5) button located in the respective Biomicroscopy and Ophthalmoscopy sections.

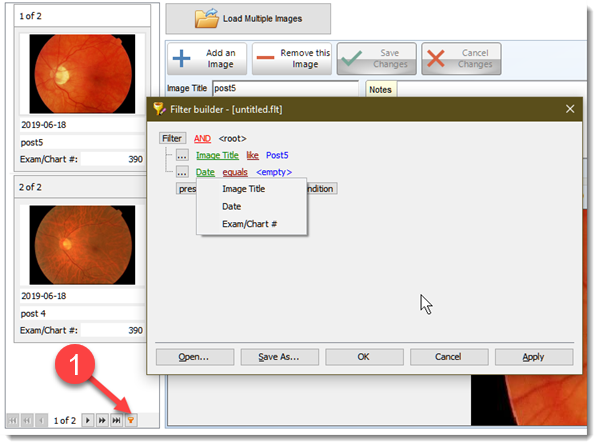
Find / Filter Images
You can filter images by using the filter tool (1) located in the image grid. Using the Filter builder screen you can enter and locate the image of your choice.