To create an Appointment Type for use in the Scheduler, you must enter the various appointments in the System/Settings section of Filopto.
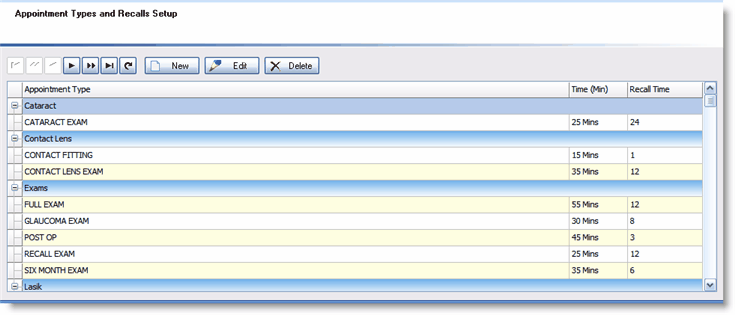
The Appointment Type settings are located in the System module, by choosing the Appointment / Recall Types table.

In this screen, users can define the various procedures and appointment types that can be scheduled. This is the list of appointment types which will appear in the New Appointment Dialogue Box , on the Scheduler screen in the Appointment Legend, and in the "Recall" section of the patient record.
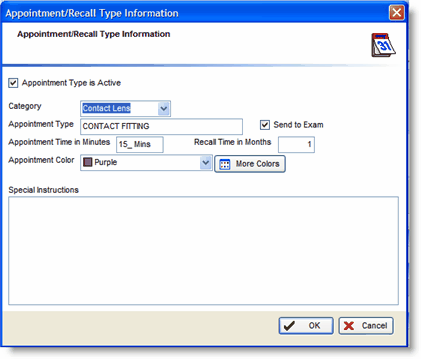
A user can define
• |
If the Appointment Type is displayed in the Appointment Screen by making it Active. |
• |
a category for the type of appointment being created |
• |
the name for the appointment type or procedure |
• |
Send to Exam send the appointment record to the EMR Manager for the provider |
• |
the estimated time needed for the appointment (this is used to automatically allocate the proper amount of time in the Scheduler) |
• |
the colour assigned to the appointment type |
• |
the amount of months assigned before the next recall for this type of appointment, and |
• |
any special instructions which should be passed on to the patient upon making the appointment. |

The special instructions entered in this section will automatically be displayed in the appointment dialogue box when the appointment type is selected. Special instructions may state that the patient will be unable to drive a vehicle after the procedure and will require transportation.
IMPORTANT To enter the time entry for an appointment type, you must press the space bar after you have entered a number in the Appointment Time field. For example, to enter 22 minutes for an appointment, enter 22 followed by a space (press the space bar). Once the space bar is pressed, the entry will be converted and displayed as 22 Minutes. You can only enter minutes in this field.
|
Hint: You can also create custom appointment types for use in the patient appointment recall section. For example, by creating a custom recall type for glasses called 'Recall Glasses' you can then use this appointment type in the patient file recall section to create a custom recall notice.
To select the appointment color and legend for the Scheduler
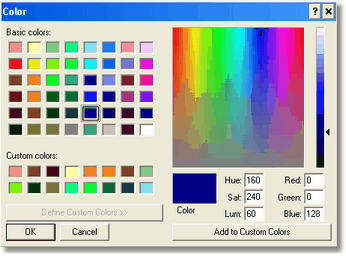
The user can also assign a color for the appointment. The color code will be used to create the appointment legend in the Scheduler module and highlight the appointment with the selected color. The drop down color picker displays the more common colors used, while the More Colors button provides access to all the colors your PC supports.

Note: You can also double click on the color pick drop down field to get access to the colors dialogue screen. |
To set the recall period for an Appointment
To set the automatic Recall time for a particular appointment, enter the number of months in the "Recall Month(s)" field for the appointment type selected. This entry will be used to automatically calculate the recall period when creating an appointment for a patient.
Change Status of Appointment Type: The value is either Active or In-Active. Active means it will be displayed as an appointment type in the Appointment screen. In-Active, will hide (not display) this appointment type (you will not be able to schedule this type of appointment).
WARNING:
When you de-activate an appointment type, the appointment screen will not display the de-activated appointment type in the dropdown appointment field. If you open historical appointments with the appointment screen the appointment type will be blank.
|
