

Accra Solutions Inc will install the server software for you, just give us a call. If you want to do it yourself follow the instructions below.
STEP 1:
Read the following installation instructions and related sub-sections before proceeding.
• Make certain that your server meets the minimum requirements to run Filopto see System Requirements, Network Port Requirements and Folder Structure for more information
• Assemble the basic information you will require to install Filopto. Contact Filopto Support that can do the installation on your server.
• Review the items in the Configuration Tab section and determine how you wish to configure them.
• Review and define the user security structure you wish to implement ( see Security Manager)
IMPORTANT:
Accra Solutions Inc. provides a FREE remote installation service. Contact us for more information.
You will require the following information to successfully complete the installation of Filopto on your Server:
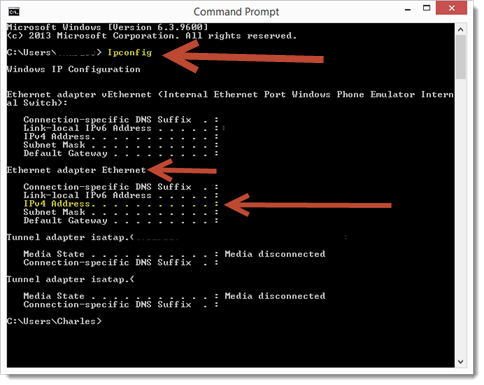
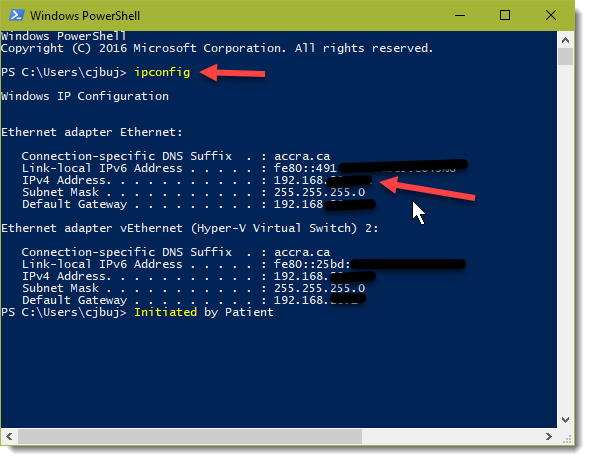
1) Your Filopto Server must have a STATIC TCP/IP address to work properly. You will be asked for the Static IP address of your Filopto server during the install process. Open a Command Prompt or a Windows PowerShell session on your server and type "Ipconfig", press enter and the IPv 4 Address will be displayed. The IP address will look something like: 192.168.1.10 for example.
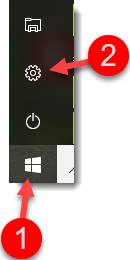
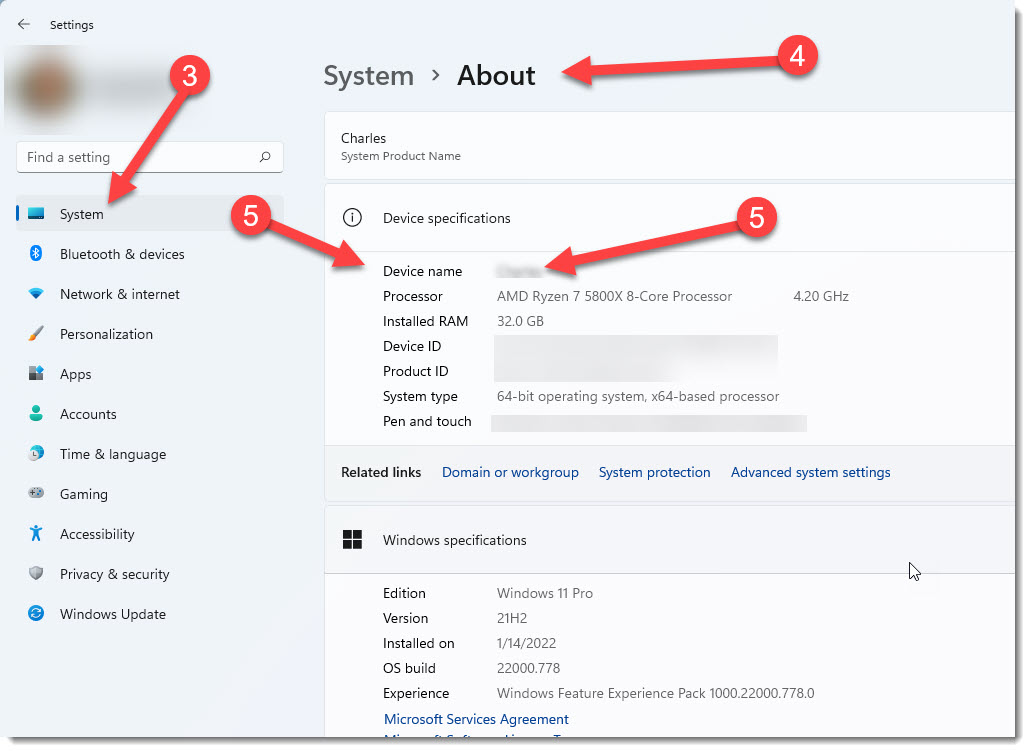
2) The Name of each PC that is going to use Filopto. You can locate the names of a Windows 11 PC by selecting the Start button (1) and then the Settings tool (2) then selecting the System (3) option and then the About (4) option. The name of the PC is located beside the Device name (5) label. Once Filopto is installed on the server, you will need to enter the name of each PC that is allowed to access Filopto.
3) Make certain that your Filopto Server firewalls have been properly configured to permit Filopto to work. The Filopto installation process will attempt to configure your Firewall automatically but due to the vast number of available firewalls and their endless possible configurations, you may be required to manually configure your firewall before Filopto is able to function properly. (See Firewall and Proxy settings in this help file for additional information.)
4) Some Anti-virus/Malware programs are know to incorrectly identify software as containing virus and will block their installation or operations. We recommend that you turn off any third party anti-virus software before proceeding with the installation of Filopto.
Filopto programs, libraries and executable adheres to the Microsoft Authenticode security standard. Filopto uses the International Comodo Code Signing certificate to secure and deliver virus free Filopto setup and update programs. Microsoft Operating System will automatically validate the signed files before install and use by the users. If they have been compromised Windows will display a message identifying that the security certificate has been tampered with and is no longer secure.
If running an anti-virus software on the server make certain to exclude the Filopto.fdb database or severe performance issue will arise.
|
STEP 2:
Download the Filopto 10 installation file from your users account on the Filopto WEB Site. You will require your Username and Password to access the client side of the web site.
Once the setup program is downloaded to your Filopto server. Run the setup program and follow the installation wizard instructions.
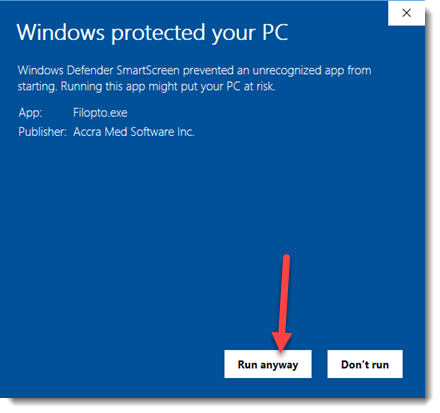
The Filopto programs and setup are code sign using Microsoft Code signing procedures. This insures that only validated programs run on your PC. However, depending on the security settings on your PC and network, Windows may pop up a Windows Defender SmartScreen warning indicating that you are about to Install or run the Filopto program for the first time. By selecting the show details option you can add (Run anyway button) Filopto to your trusted applications.
STEP 3:
Install and activate the Filopto licenses. See Register / Activate Filopto under the Configuration Manager Tab for more information.
STEP 4:
Review the First Things To Do help section and make certain you have completed each item. Run the Filopto Easy Setup Wizard to configure the base information required to activate your database. The Easy Setup Wizard is located in the Configuration Tab.
